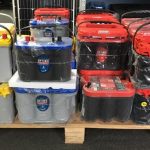
Most RVs come with 12 volt lead acid RV house batteries, which usually hold an optimal charge of approximately 13 volts when fully charged, providing their highest level of efficiency. A battery’s amp-hour rating will tell you how long a battery can hold this charge. It’s important to monitor your battery’s voltage capacity, because if an RV battery drops below 10 volts for an extended period of time, it may never again function properly.
Assess The Battery Voltage
Check the voltage of each battery in your RV. If one battery is holding lower voltage than the others, every battery in the battery bank will be affected and show low voltage. Using a volt meter or multi-meter tool, begin testing the system by acquiring the voltage reading of the entire battery bank first. Then test each battery individually by isolating each battery from the battery bank. For this procedure, you’ll need to disconnect the cables connecting each battery’s positive and negative terminals to one another. Each battery should show the same voltage output. If one battery has a lower voltage output than the others, you probably found the cause for your battery bank not holding a charge. If so, replace the bad battery with a new one, and see if your battery bank holds a charge.Determine Each Battery’s Age
Batteries have a specified lifespan, and a battery that won’t hold a charge may be beyond its working dates. Look at your battery label for the warranty date. If your battery is showing signs of failing and is still within warranty, the manufacturer will usually replace it free of charge. Take your battery to an auto parts store or RV repair shop, where the battery can be thoroughly tested.Check Water Levels of Your Batteries
If your RV batteries are flooded lead acid batteries (not sealed), which require you to maintain the water level, check the water cells of each battery. Begin by removing the cap of each battery (or view from the side if you have a clear battery). If one water cell has less fluid than the others, the entire battery will be affected. Top off the cells with distilled water, using care not to overfill each cell. Doing so will cause water to spill out and corrode the contacts with electrolytes.Test the Specific Gravity of Each Battery’s Water Cells
Using a hydrometer (a siphoning diagnostic tool providing specific gravity meter readings), test the water in each battery cell. Always wear hand and eye protection when handling the battery liquid, since RV batteries contain lead acid, a highly corrosive form of water.Seek Phantom Loads and Short Circuits
If your batteries still won’t hold a charge, begin investigating your RV’s electrical system for shorts, or unnecessary electrical loads. Assess the RV’s wiring to look for short circuits, or appliances and devices that you didn’t know were plugged in. Next, trace the wiring connections from your battery bank to different connections throughout your RV. For example, pull out your your central distribution panel and ensure that no wires are frayed and touching one another. Next, trip each circuit breaker to ensure they’re functioning perfectly, and remember to check all automotive fuses as well.Perform an Equalization Charge
An equalization charge is a high voltage charge that will detach electrolytes from the battery plates, which can improve your battery’s output. Your inverter or charger will most likely have a special function that allows you to perform this procedure in a pre-determined amount of time. Always conduct this process in a well-ventilated area, with the battery cap covers removed. You will need to closely monitor the temperature of the battery, since the water inside the battery cells will get warm and percolate. An equalization charge is one of the last steps you’ll want to take before consulting a professional for help determining why your RV batteries won’t hold a charge, or if they are capable of ever doing so again.


